Table of Contents
ToggleA <a href="https://canmeximports.com/how-to-backyard-entertaining/”>backyard designed with kids in mind becomes more than just a lawn, it’s a daily invitation to explore, create, and burn off energy without a screen in sight. Whether working with a sprawling half-acre or a compact urban lot, homeowners can craft outdoor zones that keep children engaged while adding lasting value to the property. The best backyard setups blend safety, durability, and flexibility, growing alongside kids from toddler years through the climbing-tree phase and beyond.
Key Takeaways
- Custom backyard ideas for kids blend safety, durability, and flexibility by using pressure-treated lumber, concrete footings, and engineered wood fiber surfacing to prevent injuries.
- DIY play structures like platform forts and climbing walls can be built affordably with basic materials; a swing beam should span no more than 10 feet between supports with swings positioned at least 24 inches apart.
- Activity zones—sensory gardens, art stations, and mud kitchens—keep children engaged while teaching hands-on skills like growing food and creative expression.
- Budget-friendly features such as tire swings (often free), repurposed pallets, and water walls cost under $30–$100 and deliver high impact without contractor budgets.
- Proper planning includes calling 811 before digging, checking local building codes, installing drainage with a 2% slope, and maintaining sightlines from the house for safe supervision.
- Quarterly inspections and maintenance of hardware, ropes, protective surfacing, and wood condition ensure the backyard remains safe and usable as kids grow.
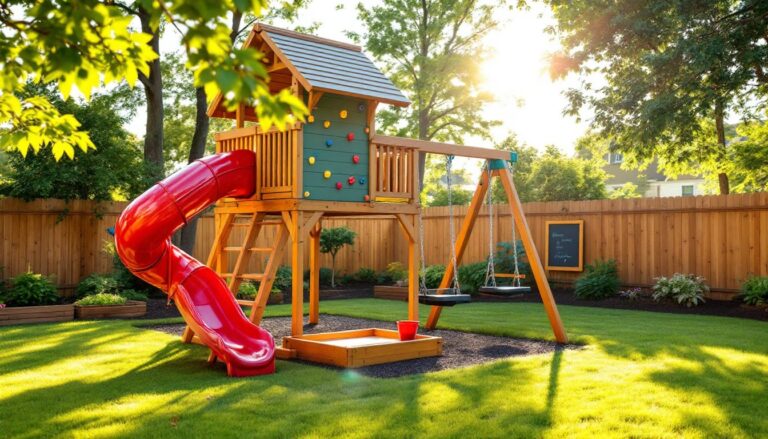
DIY Play Structures That Spark Adventure
Building a custom play structure offers control over size, materials, and budget that prefab kits can’t match. Start with pressure-treated lumber (usually Southern Yellow Pine rated for ground contact) for posts and framing. Nominal 4×4 posts are actually 3.5″ × 3.5″ and should be sunk at least 24 inches deep in concrete footings to meet most local codes for playground equipment.
A basic platform fort begins with four corner posts, a framed deck using 2×6 joists on 16-inch centers, and 3/4-inch exterior-grade plywood decking. Add a climbing wall on one side using 3/4-inch plywood with bolt-on climbing holds (space them 12–18 inches apart for younger kids). On another side, mount a slide, commercial-grade plastic slides designed for residential use typically require a platform height of 4–5 feet and cost $150–$300.
For a swing beam, use a 6×6 beam spanning no more than 10 feet between supports. Hang swings using galvanized eye bolts (minimum 1/2-inch diameter) with lock nuts and washers. Position swings at least 24 inches apart and 30 inches from support posts. A sandbox tucked underneath the platform offers shade and defines a contained play zone, line it with landscape fabric before adding play sand (not construction sand, which contains silica dust).
Safety note: Spread a 6-inch layer of engineered wood fiber (EWF) or rubber mulch in a fall zone extending at least 6 feet in all directions from the structure. This cushioning material meets ASTM F1292 impact attenuation standards for playgrounds.
A backyard zipline appeals to older kids and uses minimal ground space. Kits include a stainless steel cable, turnbuckles, spring brake, and trolley. Mount the starting platform 8–10 feet high on a tree or post, sloping down 3–6% to a stopping point. Trees should be at least 12 inches in diameter: use tree-friendly straps rather than lag bolts. For posts, sink 6×6 pressure-treated lumber 3 feet deep in concrete. This project requires careful tensioning and a second pair of hands for installation.
Creative Activity Zones for Every Age
Dedicated activity zones give kids ownership of outdoor space while keeping gear organized. Delineate areas using landscape edging, pavers, or simply different ground covers.
Sensory Gardens and Nature Exploration Areas
A sensory garden introduces kids to plants through touch, smell, and sound. Choose hardy, non-toxic varieties that forgive rough handling. Lamb’s ear (Stachys byzantina) offers fuzzy leaves kids love to stroke. Lemon balm and mint release scent when brushed (plant mint in containers, it’s invasive). Ornamental grasses like fountain grass rustle in the breeze and provide texture contrast.
Create a “pizza garden” with oregano, basil, parsley, and cherry tomatoes in a circular bed divided into wedge-shaped sections. Kids can harvest ingredients they helped grow. Use raised beds built from 2×8 or 2×10 cedar boards, they warm up faster in spring and make planting accessible for small hands. A 4×4-foot bed needs roughly 1.5 cubic yards of soil mix.
Add a bug hotel using stacked pallets filled with bamboo tubes, pine cones, and bark to attract beneficial insects. A shallow bird bath (2 inches deep max) brings wildlife close for observation. For tactile exploration, many gardeners incorporate natural materials and plantings that engage multiple senses throughout the growing season.
Art and Craft Stations for Outdoor Creativity
An outdoor art station contains mess and encourages bold projects impossible indoors. Mount a chalkboard (4×8-foot sheet of chalkboard-painted plywood or porcelain steel) on a fence or shed wall. Attach a rain gutter beneath it to hold chalk and erasers, cut a 6-foot section of vinyl gutter and mount with standard brackets.
Build a mud kitchen from reclaimed materials: an old sink basin set into a plywood counter, hooks for utensils, and open shelving made from cinder blocks and boards. Add a water source, either a nearby hose bib or a 5-gallon beverage cooler with a spigot refilled daily.
For messy projects, pour a simple concrete pad (6×8 feet, 4 inches thick) as a washable craft zone. A single 60-pound bag of concrete mix covers about 0.45 square feet at 4-inch depth, so a 48-square-foot pad requires roughly 27 bags plus gravel base and wire mesh. Alternatively, lay patio pavers over compacted gravel and sand, easier to level and adjust than poured concrete.
Budget-Friendly Backyard Features Kids Will Love
High-impact play features don’t require contractor-level budgets. A tire swing needs one truck tire (free from tire shops), three lengths of marine-grade rope or chain, and a sturdy branch or beam. Drill drainage holes in the tire bottom to prevent mosquito breeding.
Repurpose wooden pallets (often free from building supply stores, ask for heat-treated “HT” stamped pallets, not chemically treated “MB”) into balance beams, teepee frames, or vertical gardens. Sand rough edges and check for protruding nails before use.
A DIY water wall transforms a chain-link fence section into a splash zone. Mount funnels, PVC pipe sections, and plastic bottles cut in half using zip ties. Kids pour water at the top and watch it cascade through the contraptions. Total cost: under $30.
Create a stepping stone path using quick-set concrete and a reusable plastic mold (around $12). Each 80-pound bag of concrete mix makes 4–6 stones depending on thickness. Let kids press handprints or embed smooth glass pebbles before the concrete sets.
For shade on a budget, plant fast-growing vines like clematis or morning glory on a simple trellis made from 2×2 lumber in an A-frame or lean-to configuration. Alternatively, stretch shade cloth (50% or 70% density) across galvanized pipe or EMT conduit secured with clamps. A 10×10-foot shade structure built this way costs $60–$100.
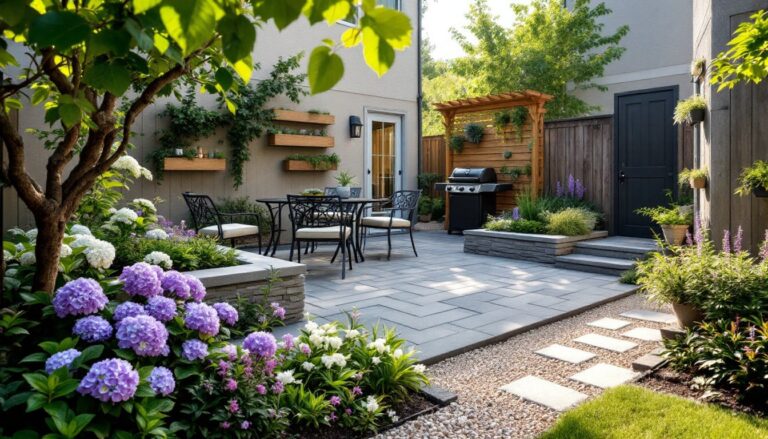
Transform an old trampoline frame into a sunken trampoline by digging a pit slightly larger than the frame diameter and setting the trampoline at ground level. This eliminates the fall hazard but requires excavation, easier in sandy soil than clay. Some homeowners find this method aligns well with broader entertaining strategies that maximize usable yard space.
Safety Considerations and Smart Planning Tips
Start with a site survey. Mark underground utilities using the free 811 call-before-you-dig service, hitting a gas or electric line turns a DIY project into an emergency. Identify overhead hazards like power lines (maintain 10-foot clearance for swings and ziplines).
Check local building codes. Many jurisdictions require permits for structures over a certain height (often 10 feet) or with a footprint exceeding 120 square feet. Permanent play structures may affect property setbacks, typically you’ll need to stay 5–10 feet from property lines, but this varies. A quick call to the building department prevents costly teardowns.
Anchoring matters more than most DIYers realize. Swing sets and climbing structures generate significant lateral force. Use concrete footings (12-inch diameter, 24–36 inches deep depending on frost line) for posts. In areas with deep frost penetration, footings must extend below the frost line to prevent heaving.
Eliminate tip hazards and pinch points. Sand all cut lumber edges with 80-grit sandpaper. Countersink screw heads and cover bolt ends with acorn nuts or cap nuts. Space deck boards 1/4 inch apart to prevent finger catching while allowing drainage.
Inspect outdoor features quarterly. Tighten hardware (vibration loosens bolts over time), check ropes and chains for fraying, and top up protective surfacing as it compresses and scatters. Replace any cracked or splintered wood immediately.
Plan for drainage. Play areas shouldn’t collect standing water, mosquitoes breed in as little as a bottle cap of water. Grade surfaces with a 2% slope (1/4 inch per foot) away from structures. For low spots that won’t drain, install a dry well (a gravel-filled pit that disperses water underground) or a French drain using 4-inch perforated drainpipe wrapped in landscape fabric.
Sun exposure is often overlooked until kids get burned. Observe the yard at different times of day to identify shaded areas for play structures. If natural shade is limited, structures like pergolas become important: experienced hosts who’ve planned outdoor gatherings know that shade provisions matter year-round.
Consider sight lines from the house. Positioning play zones within view of kitchen or living room windows allows supervision while multitasking. This principle appears in many backyard design approaches that balance functionality with family needs.
Conclusion
A kid-friendly backyard evolves with the family. Start with one anchor project, a play structure, activity zone, or simple feature, and expand as time and budget allow. Prioritize safety and durability over aesthetics: the best backyard is the one that gets used daily, complete with grass worn thin from running feet and mud kitchen “soups” that need hosing off the fence.