Table of Contents
ToggleBuilding a patio is one of those projects that transforms how a homeowner uses their backyard. Done right, it creates a durable, low-maintenance surface that handles everything from grilling season to winter freeze-thaw cycles. Pavers offer flexibility that poured concrete can’t match, individual units can shift without cracking, they’re repairable, and installation doesn’t require heavy equipment or a crew. Whether someone’s eyeing concrete patio pavers for budget-friendly coverage or natural stone patio pavers for high-end curb appeal, the material and layout decisions made upfront determine how the surface performs for decades. This guide walks through the options, planning steps, and installation considerations to help homeowners choose pavers that fit their project scope and skill level.
Key Takeaways
- Pavers for patio projects offer superior durability and flexibility compared to poured concrete, with individual units that can shift independently, resist cracking, and be easily replaced without removing the entire surface.
- Concrete pavers are the most budget-friendly option at $3–$6 per square foot, while natural stone and brick pavers range from $8–$30+ per square foot depending on material and quality.
- Proper installation of patio pavers requires meticulous base preparation including 4–6 inches of compacted gravel, 1 inch of leveling sand, edge restraint, and a 2% slope away from the house to prevent water damage and settling.
- Your climate zone determines the best paver material—freeze-thaw regions require SX-rated brick or dense concrete, while softer stones like limestone are better suited for mild climates.
- Smaller DIY patios (under 100 square feet) are manageable projects with basic tools like a rented plate compactor, but larger installations benefit from professional excavation and grading services.
- Polymeric sand used in the final step hardens when watered to lock pavers together, prevent weeds, and create a unified surface that resists movement and requires minimal long-term maintenance.
Why Choose Pavers for Your Patio?
Pavers deliver durability without the permanence, or the cracking risk, of monolithic concrete slabs. Each unit sits on a compacted base and sand bed, allowing slight independent movement as soil settles or frost heaves the ground. If one paver cracks or stains, a homeowner can pop it out and replace it in minutes. Try doing that with a stamped concrete patio.
Cost runs higher than a basic concrete pour, but the gap narrows when factoring in long-term maintenance. Pavers don’t require sealing as often as stamped concrete, and they won’t develop the spiderweb cracks that plague slabs in freeze-thaw climates. Installation’s also DIY-friendly for smaller patios, no mixer truck, no troweling against the clock before the concrete sets.
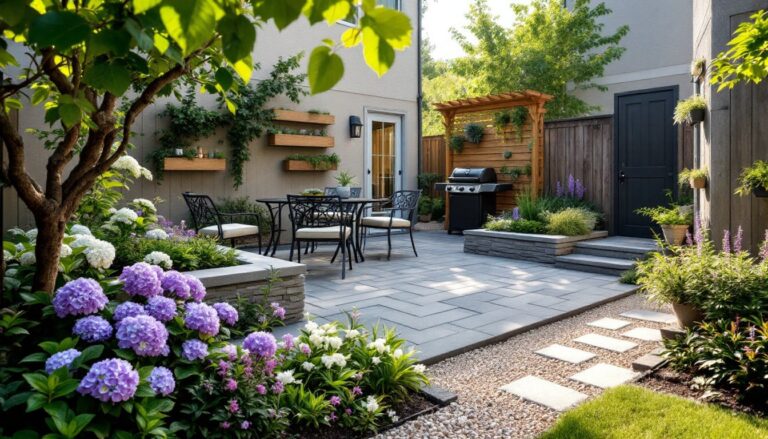
From a design standpoint, pavers offer modular flexibility. Homeowners can mix sizes (think large pavers for patio fields bordered by smaller accent units), create curves without custom formwork, or build in stages as budget allows. Permeable pavers even handle stormwater runoff better than solid surfaces, which matters in jurisdictions with runoff regulations.
The trade-off? Labor. Setting pavers requires excavation, base prep, edge restraint, and careful leveling. Skipping steps, especially compaction, leads to settling, lippage (uneven edges), and weed growth. But for a homeowner willing to rent a plate compactor and spend a weekend on prep, the result’s a surface that can outlast the mortgage.
Types of Patio Pavers: Materials and Styles Explained
Concrete Pavers
Concrete pavers for patio projects dominate the market for good reason: they’re affordable, consistent in size, and available in dozens of shapes and colors. Manufactured units are molded under high pressure, making them denser and more durable than poured concrete. Expect to pay $3–$6 per square foot for materials, depending on finish and thickness.
Standard thicknesses run 2⅜ inches for pedestrian patios: go with 3⅛ inches if the surface will see occasional vehicle traffic (like a driveway apron). Shapes range from basic 4×8-inch rectangles to interlocking Holland or herringbone patterns that resist shifting.
Concrete pavers come in three finish types:
- Tumbled: Edges are mechanically worn for an aged look: hides chipping better than sharp-edged units.
- Smooth: Clean, modern lines: shows wear and stains more readily.
- Textured: Embossed surfaces mimic stone or brick: adds slip resistance.
Colors fade over time under UV exposure, especially reds and browns. If color retention matters, look for units with integral pigment throughout the paver, not just a surface coating. Some homeowners prefer the weathered patina: others reseal every few years to restore vibrancy.
For those hunting for cheap patio pavers, concrete’s the go-to. Big-box stores stock standard gray 12×12-inch square pavers patio-ready in bulk pallets, often under $2 per square foot. They won’t win design awards, but they’re bombproof for utilitarian spaces.
Natural Stone Pavers
Stone patio pavers bring texture and color variation that manufactured products can’t replicate. Flagstone, bluestone, limestone, and travertine are common choices, each with distinct characteristics.
Flagstone (sandstone or quartzite) arrives in irregular shapes, requiring fitted layouts with wide or narrow joints. Thickness varies, 1 to 2 inches is typical, so achieving a level surface takes patience. Cost: $15–$30 per square foot installed, depending on region and stone type.
Bluestone offers uniform thermal (rough) or natural cleft (textured) surfaces in rectangular cuts. It’s a favorite for formal patios in the Northeast. Expect $10–$20 per square foot for materials.
Travertine and limestone are softer, porous stones that require sealing in freeze-thaw climates. They stay cooler underfoot than concrete, a plus for pool decks in hot climates, but can etch from acidic spills.
Stone pavers weigh significantly more than concrete, so base prep becomes even more critical. A poorly compacted base will settle unevenly, and re-leveling a 50-pound bluestone slab isn’t a quick fix. Thickness also matters for structural stability: thin stone (<1 inch) should be mortared over a concrete slab rather than sand-set.
Many design-focused homeowners gravitate toward stone for high-visibility front patios or entertaining areas where aesthetics justify the cost.
Brick Pavers
Clay brick pavers deliver old-world charm and exceptional longevity, some historic brick streets have lasted over a century. Unlike concrete, brick color runs through the entire unit, so chips and wear don’t expose a different tone underneath.
True paving brick differs from wall brick. It’s fired at higher temps for better frost resistance and carries an ASTM C902 rating for SX (severe weathering) or MX (moderate weathering). Using standard wall brick outdoors invites spalling (surface flaking) after a few freeze-thaw cycles.
Standard dimensions are 4×8 inches and about 2¼ inches thick. Patterns like running bond, basketweave, or herringbone add visual interest and structural interlock. Cost runs $8–$15 per square foot for materials.
Brick’s porous, so it absorbs water. In cold climates, sealing helps reduce moisture intrusion, but it won’t make brick impervious. Efflorescence (white mineral deposits) can appear as salts leach out: it’s cosmetic and fades with weathering.
Brick works well for pavers for backyard patio projects where traditional aesthetics fit the home’s architecture, especially Colonial, Craftsman, or farmhouse styles.
How to Choose the Right Pavers for Your Patio Project
Start with climate. Freeze-thaw zones demand pavers rated for severe weathering. That means SX-rated brick, dense concrete (check the manufacturer’s absorption rate, lower is better), or hard stone like granite or bluestone. Softer limestone and some sandstones can flake in harsh winters.
Next, assess the project scope. A small 10×10-foot patio is manageable for a DIYer with basic tools: a plate compactor (rent for about $75/day), a masonry saw or angle grinder with diamond blade for cuts, and a 4-foot level. Big pavers for patio layouts (like 24×24-inch slabs) cover ground fast but require two people to maneuver, each slab weighs 70–100 pounds.
Larger patios (300+ square feet) involve significant excavation and base material. Figure on removing 6–8 inches of soil, then building up layers of compacted gravel base (4–6 inches) and leveling sand (1 inch). That’s multiple tons of material to haul and spread. If the site has poor drainage or slopes toward the house, hiring a landscaper to handle grading might be the smart move.
Budget matters, obviously. Here’s a rough breakdown per square foot, materials only:
- Concrete pavers: $3–$6
- Brick pavers: $8–$15
- Natural stone: $10–$30+
- Porcelain pavers: $12–$25
Add 30–50% for base materials (gravel, sand, edge restraint) and another 50–100% for labor if hiring out. Many regional suppliers stock economy lines and premium options, so visiting a local yard beats ordering sight-unseen online.
When shopping, bring measurements and a sketch. Paver quantities are sold by the square foot, but corner cuts and pattern waste add 5–10% to the order. Most yards have design software or printed layout guides, use them.
Don’t skip the edge restraint. Plastic paver edging stakes into the base and keeps perimeter units from creeping. It’s cheap insurance against a wavy border. Metal or aluminum edging works for curves: rigid PVC works for straight runs.
Finally, consider where to buy patio pavers. Big-box stores offer convenience and competitive pricing on common concrete units, but selection’s limited. Specialty hardscape suppliers carry a wider range of sizes, colors, and stone types, plus they’ll often deliver pallets for a fee. Some even offer paver layout services if purchasing a full pallet.
Planning Your Patio Paver Installation
Before digging, call 811 to mark underground utilities. Hitting a gas or electric line isn’t just dangerous, it’s expensive to repair and might involve fines.
Layout starts with string lines and stakes. Patios need a 2% slope away from the house, that’s ¼ inch per foot, to shed water. Use a line level or laser level to set the grade. Mark the slope on stakes at each corner, then run string lines to guide excavation depth.
Excavation depth depends on paver thickness and base layers. For standard 2⅜-inch concrete pavers, dig down about 8–9 inches below final grade:
- 4–6 inches compacted gravel base (¾-inch crushed stone works well)
- 1 inch leveling sand
- 2⅜ inches paver thickness
Compact the gravel in 2-inch lifts using a plate compactor. A single deep layer won’t compact evenly and will settle later. Pros run the compactor over each lift until it stops leaving footprints, that’s the field test for adequate density.
Edge restraint goes in after the base is compacted but before sand. Spike it into the compacted gravel along the perimeter. This locks the border pavers and prevents the whole field from shifting outward over time.
Spread bedding sand (concrete sand, not masonry sand, the grain size matters) evenly, then screed it level using a straight 2×4 notched to the correct depth. Don’t compact the sand before laying pavers: the pavers themselves compact it as they’re tamped and vibrated into place.
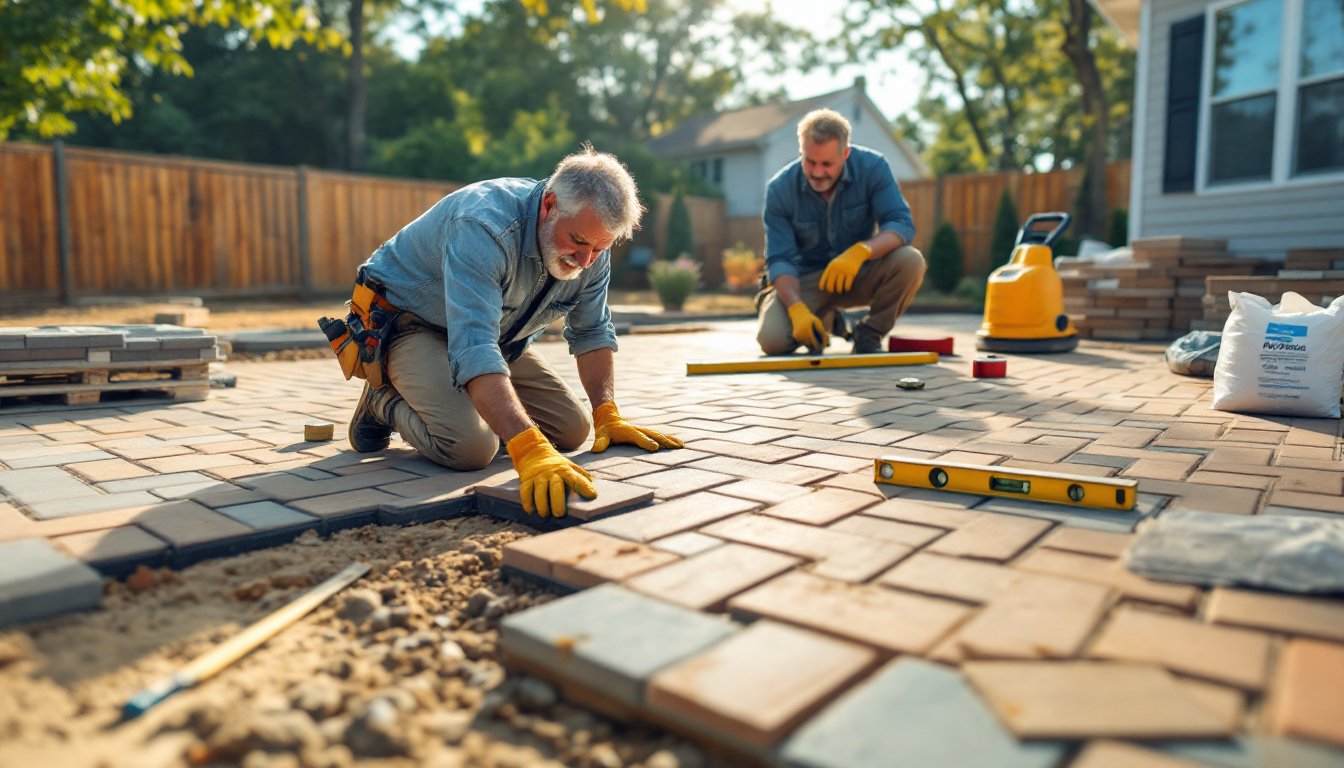
Start laying pavers from a 90-degree corner if the patio’s rectangular, or from a straight edge if it’s freeform. Work outward, kneeling on pavers already set to avoid disturbing the sand bed. Butt joints tight (no spacers needed for most interlocking pavers), and check level every few rows.
Cutting’s inevitable. A masonry saw (wet saw) gives the cleanest cuts and generates less dust than a grinder, but rental rates run higher ($60–$100/day). For a dozen cuts, an angle grinder with a diamond blade and a steady hand does fine. Wear safety glasses, a dust mask, and hearing protection, cutting pavers is loud and throws grit.
Once all pavers are set, spread polymeric sand over the surface and sweep it into the joints. Polymeric sand contains adhesives that harden when misted with water, locking pavers together and resisting weed growth. Follow the manufacturer’s instructions, over-watering or under-watering can cause haze or poor curing.
Run the plate compactor over the finished surface to seat pavers and vibrate sand into joints. Add more polymeric sand if joints settle, then mist again. Let cure for 24–48 hours before heavy use.
Permits vary by jurisdiction. Most areas don’t require permits for non-attached, ground-level patios under a certain square footage (often 200 square feet), but always check local codes. If the patio’s adjacent to the house or involves drainage work, a permit might be needed.
For inspiration on layouts and material pairings, many homeowners browse curated design galleries before finalizing their plan. Patterns like herringbone or basketweave add visual complexity without extra material cost, just more cutting.