Table of Contents
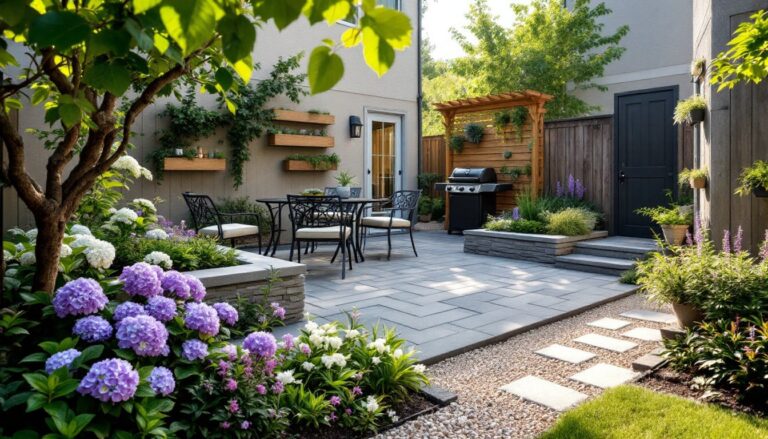
ToggleChoosing the right patio flooring can make or break your outdoor space. The surface underfoot sets the tone for everything, from casual weekend BBQs to quiet mornings with coffee. Whether you’re working with a tight budget or looking to invest in premium materials, understanding your options helps you avoid costly mistakes and build something that lasts. This guide walks through seven proven patio flooring ideas, from classic concrete to modern composites, with practical insights on installation difficulty, cost factors, and what works best for different climates and use cases.
Key Takeaways
- Patio floor ideas range from budget-friendly concrete ($4–$8 per square foot) and gravel to premium natural stone ($15–$30 per square foot), each offering distinct advantages in durability, aesthetics, and maintenance.
- Proper site preparation—including gravel base, compaction, and drainage—is critical regardless of patio flooring material, as it prevents cracking, settling, and costly repairs down the road.
- Concrete offers design versatility through stamped patterns and color additives, while brick and pavers provide DIY-friendly installation with straightforward base prep and polymeric sand jointing.
- Natural stone and porcelain tiles deliver timeless elegance but require skilled installation; stone is permeable and ages beautifully, while porcelain excels in freeze-thaw climates with minimal maintenance.
- Composite decking and stabilized decomposed granite eliminate extensive upkeep, making them ideal for homeowners prioritizing convenience, though initial investment and expansion characteristics vary by material.
- Matching your patio floor choice to climate conditions, foot traffic patterns, and personal maintenance tolerance ensures long-term satisfaction and prevents premature deterioration.
Concrete Patio Floors: Versatile and Budget-Friendly
Concrete remains one of the most practical choices for outdoor patio flooring ideas, especially for homeowners tackling their first hardscape project. A standard 4-inch thick concrete slab costs roughly $4–$8 per square foot for materials and labor, though prices fluctuate by region and site prep requirements.
Poured concrete offers design flexibility that surprises people. Stamped patterns mimic natural stone or brick without the installation headaches. Acid stains and integral color additives create custom hues that won’t peel or fade like paint. For a smoother finish, broom-finished concrete provides slip resistance without added texture treatments.
Installation requires proper site grading, compacted gravel base (typically 4–6 inches), and vapor barrier in areas with high groundwater. DIYers can handle small pours (under 100 square feet) with rented equipment, but larger patios benefit from professional screeding and finishing to avoid drainage issues and cracking. Control joints cut every 8–10 feet help manage inevitable expansion and contraction.
Concrete’s weak spot is surface cracking in freeze-thaw climates. Proper reinforcement with wire mesh or rebar (depending on load and soil conditions) extends lifespan. Sealed concrete resists stains and moisture penetration, reapply penetrating sealers every 2–3 years for best results. For cheap outdoor patio flooring ideas that don’t skimp on durability, a basic broom-finished slab with proper drainage is hard to beat.
Natural Stone Flooring for Timeless Elegance
Natural stone delivers the look that backyard patio floor ideas aspire to, weathered bluestone, warm sandstone, or rugged slate that improves with age. Expect to pay $15–$30 per square foot installed for flagstone or irregular pieces, more for cut pavers with uniform dimensions.
Flagstone (sedimentary rock split into flat pieces) works beautifully for irregular “crazy paving” layouts. Pieces typically range from 1–2 inches thick. Set them in a sand bed over compacted base for a permeable surface, or mortar them to a concrete slab for a more formal look. Sand-set installations allow water drainage between joints but require edge restraint to prevent shifting.
Bluestone and limestone offer more consistent color and can be cut into rectangular pavers for running bond or herringbone patterns. These dense stones handle foot traffic and furniture weight without issue, though limestone is more porous and may stain in areas with tannin-heavy leaves or spilled drinks.
Installation difficulty varies. Sand-set flagstone is a manageable weekend project for someone comfortable with a plate compactor and level work. Mortared installations over concrete require more skill, joints must be tooled properly to shed water and prevent freeze damage. Stone is heavy: a pallet of flagstone weighing 3,000–4,000 pounds needs accessible delivery and strong backs for placement. Many landscape design guides highlight stone’s versatility in creating outdoor rooms that feel permanent and well-crafted.
Maintenance is minimal. Sweep regularly and rinse with water. Avoid acidic cleaners on limestone or marble. Sealed stone resists stains but changes the natural matte finish, test in an inconspicuous spot first.
Brick and Pavers: Classic Patterns with Modern Appeal
Brick and concrete pavers combine traditional aesthetics with straightforward installation, making them popular ideas for patio floor projects. Clay brick pavers run $8–$15 per square foot installed, while concrete pavers cost $6–$12 per square foot depending on finish and thickness.
Standard brick pavers measure 4 x 8 inches and roughly 2¼ inches thick (actual dimensions, not nominal). Concrete pavers come in dozens of shapes, from cobblestone replicas to large-format slabs. Thicker pavers (60mm or 2⅜ inches) handle vehicular loads: residential patios do fine with standard thickness.
Pattern options include running bond (offset like traditional brickwork), herringbone (provides interlock and resists shifting under furniture), basketweave, and circular or radial layouts for focal points. Herringbone requires more cuts at borders but delivers superior stability without mortar.
Installation follows a proven sequence: excavate to depth (typically 7–9 inches for patio use), add 4–6 inches of compacted crushed stone base, then 1 inch of bedding sand screeded level. Pavers go down on the sand, then a plate compactor with rubber pad vibrates them into place. Polymeric sand swept into joints hardens when moistened, locking pavers together and resisting weed growth and ant infiltration.
DIY-friendly? Absolutely, if you’re methodical. Rent a plate compactor (about $75/day) and don’t skip base compaction, compact in 2-inch lifts. Edges need restraint: plastic or aluminum paver edging staked every 12 inches, or a concrete edge pour. Border cuts require a wet-cutting masonry saw or angle grinder with diamond blade: wear eye and ear protection.
Brick pavers weather to a warm patina. Concrete pavers resist fading better than older formulations but still lose vibrancy over 10–15 years in direct sun. Both materials allow easy spot repairs, pop out a damaged paver, drop in a replacement.
Wood and Composite Decking for Warmth and Comfort
Wood and composite decking create elevated patio flooring ideas that feel warm underfoot and integrate seamlessly with home architecture. Costs range widely: pressure-treated pine decking runs $3–$6 per square foot for materials, cedar or redwood $6–$10, and composite decking $8–$12 per square foot.
Pressure-treated lumber (typically Southern Yellow Pine infused with preservatives) offers the most budget-friendly entry point. Nominal 5/4 x 6-inch deck boards (actual 1 x 5½ inches) span 16-inch joist spacing. Let PT lumber dry for a few weeks before sealing or staining, it ships wet and will warp if finished too soon.
Cedar and redwood contain natural oils that resist rot and insects without chemical treatment. They’re lighter, easier to cut, and age to a silvery gray unless sealed annually with UV-protective stain. Both are softer than PT pine and dent more easily under dropped tools or furniture.
Composite decking (wood fiber and recycled plastic) eliminates most maintenance. It won’t rot, splinter, or need staining, though it costs more upfront and expands/contracts with temperature swings. Follow manufacturer fastening specs closely, hidden clip systems work best and avoid surface screws. Composites get hot in direct sun: lighter colors stay cooler underfoot.
All decking requires a support structure: posts set in concrete footings (depth per frost line and local code), beams, and joists. Even ground-level “floating” decks need proper footings in most jurisdictions, check local building codes. Joist spacing depends on decking material: composites often require 12-inch centers for rigidity.
Tooling needs include a miter saw or circular saw, drill/impact driver, level, and post-hole digger or auger. Elevated decks over 30 inches typically require permits and railing per IRC codes. For patio flooring ideas that double as entertainment space, adding outdoor lighting and seating areas enhances usability year-round.
Maintenance varies: PT lumber needs annual cleaning and re-staining, cedar benefits from similar care, composites just need occasional washing with soap and water.
Gravel and Decomposed Granite: Low-Maintenance Alternatives
Gravel and decomposed granite (DG) deliver some of the cheapest outdoor patio flooring ideas without sacrificing style. Expect to pay $1–$3 per square foot installed for gravel, slightly more for stabilized DG.
Pea gravel (smooth, rounded stones roughly ¼–½ inch diameter) creates a casual, cottage-garden look. It shifts underfoot, so it’s not ideal under dining furniture but works well for pathways and lounge areas. Larger crushed stone (¾-inch minus) compacts tighter and provides a firmer surface.
Decomposed granite is granite rock broken down to fine particles (⅛ inch and smaller). Natural DG compacts into a firm, permeable surface with an earthy color. Stabilized DG includes a binder (polymer resin) that hardens when wet, creating a nearly solid surface that resists erosion and weed growth.
Installation is straightforward: excavate 3–4 inches, lay landscape fabric to suppress weeds, add 2–3 inches of compacted base rock, then 1–2 inches of DG or gravel. Compact DG with a plate compactor and mist lightly to activate binders if using stabilized product. Edge with steel, aluminum, or timber to contain material.
Gravel patios drain instantly, ideal for wet climates. They’re also forgiving for DIYers: no cutting, no mortar, and mistakes are easy to adjust. Downsides include migration (you’ll rake gravel back into place occasionally) and difficulty moving furniture with thin legs.
Maintenance is minimal. Rake to redistribute material, top-dress every few years as gravel settles or gets tracked away, and pull weeds that breach fabric. DG surfaces may need light re-compaction after heavy rain. Many outdoor living designs embrace gravel for its permeability and relaxed aesthetic, especially in drought-prone regions.
Outdoor Tiles: Porcelain and Ceramic Options
Outdoor-rated tiles bring indoor refinement to backyard patio floor ideas. Porcelain pavers designed for exterior use cost $10–$20 per square foot installed: ceramic tiles run slightly less but aren’t as frost-resistant.
Porcelain pavers (typically 20mm thick) offer low water absorption (under 0.5%), making them ideal for freeze-thaw climates. They come in large formats (12 x 24 inches, 24 x 24 inches, even 24 x 48 inches) that minimize grout lines. Textures mimic wood planks, natural stone, or concrete with impressive realism.
Installation methods vary. Pedestal systems elevate tiles on adjustable supports over a concrete or compacted base, allowing drainage and easy access to utilities underneath. This method works well for rooftop patios or areas requiring slope adjustment. Alternatively, tiles can be thin-set over a concrete slab using exterior-grade mortar and flexible grout to accommodate movement.
DIYers comfortable with tile work can handle outdoor installations, but larger formats require two people and suction-cup lifts for safe handling. Cuts need a wet tile saw with a diamond blade. Grout lines should be ⅛–¼ inch wide, filled with sanded, polymer-modified grout rated for exterior use.
Slip resistance matters. Look for tiles with a textured or matte finish and a wet DCOF (Dynamic Coefficient of Friction) rating of 0.42 or higher, this is the industry standard for safe wet traction.
Tile’s major advantage is easy cleaning: hose down, sweep, or mop with mild detergent. It resists stains, fading, and scratches better than most materials. The trade-off is hardness, dropped dishes shatter, and the surface feels cold underfoot in cooler weather. Tile also requires a stable substrate: movement or settling cracks grout and tiles.
Conclusion
The best patio flooring balances budget, climate, and how you’ll actually use the space. Concrete and gravel handle tight budgets, pavers offer DIY-friendly installation, and stone or porcelain deliver lasting visual impact. Plan for proper base prep regardless of material, it’s the difference between a patio that lasts decades and one that needs repair in five years. Pick the surface that fits your skill level and maintenance tolerance, and you’ll enjoy it for years.