Table of Contents
ToggleA functional <a href="https://canmeximports.com/best-backyard-entertaining/”>backyard walkway doesn’t require a four-figure budget or a crew of landscapers. With smart material choices and straightforward installation techniques, homeowners can build attractive, durable paths for a fraction of what professional installations cost. The key is understanding which budget materials offer the best longevity and visual impact for the effort invested. From salvaged brick to poured stepping stones, these eleven approaches deliver curb appeal without draining savings accounts.
Key Takeaways
- Budget-friendly walkway materials like gravel, mulch, and repurposed pavers cost $1–$4 per square foot installed, saving up to $1,440 on a typical 60-square-foot path compared to professional installation.
- Proper base preparation with compacted gravel or sand underlayment is essential for durability, regardless of surface material, preventing settling and weed growth that plague shortcuts.
- Cheap backyard walkway ideas succeed with affordable materials like pea gravel ($30–$50 per ton), salvaged brick, broken concrete, and DIY concrete stepping stones that deliver curb appeal without professional costs.
- Most jurisdictions permit ground-level DIY walkways under 30 inches high without inspection, eliminating permit fees and keeping projects purely material-based.
- Wood chip and mulch pathways require annual top-dressing ($20–$40 yearly) but offer natural appeal and need no edging, though they should stay 12 inches away from building foundations to prevent termite attraction.
- Proper installation details—leveled sand bases, adequate compaction, correct drainage slopes, and appropriate edging—determine long-term path performance more than initial material choice.
Why Budget-Friendly Walkways Are Worth the Investment
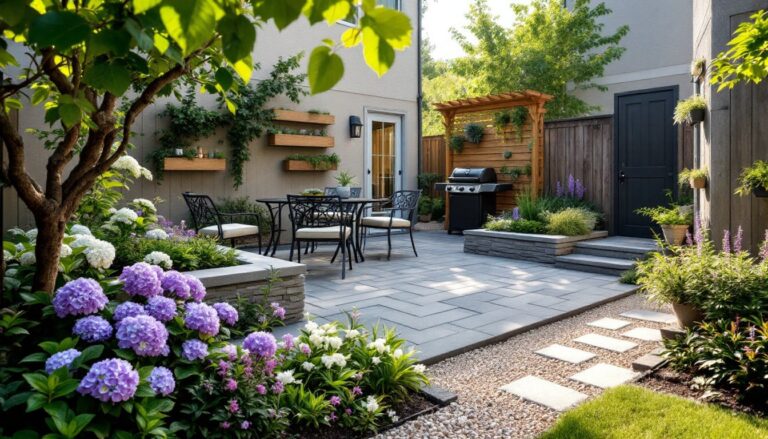
Even low-cost walkways solve real problems. They prevent muddy footprints tracked into the house, reduce lawn wear in high-traffic areas, and create clear navigation routes through garden beds. A well-placed path also increases property value, appraisers recognize functional hardscaping as a finished element, not raw yard space.
Materials like gravel, mulch, and repurposed pavers cost $1 to $4 per square foot installed (versus $8 to $25 for professional pavers or stamped concrete). For a typical 3-foot-wide, 20-foot-long walkway (60 square feet), that’s a difference between $60 and $1,500. Labor savings amplify the gap since most budget options require only basic hand tools and a weekend.
Cheap doesn’t mean flimsy. Gravel paths with proper edging last decades. Mulch walkways need annual topping but cost pennies to refresh. The durability comes from correct base prep, compacted gravel or sand underlayment prevents settling and weed growth regardless of the surface material. Skip this step, and even expensive pavers will shift and sink.
Permit requirements rarely apply to non-structural, ground-level walkways. Always verify local codes, but most jurisdictions allow DIY paths under 30 inches in height without inspection. This keeps project costs purely material-based.
Gravel and Stone Pathways: Affordable and Timeless
Gravel remains the go-to budget option for good reason. Pea gravel (3/8-inch smooth stones) costs $30 to $50 per ton, covering roughly 80 square feet at 2-inch depth. Crushed granite or limestone runs similar prices and packs tighter for firmer footing. Larger river rock (1 to 3 inches) works for decorative edging but shifts underfoot as a walking surface.
Installation requires three layers: compacted soil base, landscape fabric, and gravel. Dig the path 4 inches deep, tamp the soil with a hand tamper or plate compactor rental ($50/day), lay fabric to block weeds, then spread gravel evenly. Edge with pressure-treated 2x4s, steel edging, or mortared stone to contain the material. Without edging, gravel migrates into lawn areas within months.
Drainage is built-in, gravel paths shed water immediately, making them ideal for wet climates or low-lying yards. They also adapt to curved layouts without cutting or custom fitting. Use a garden hose to mark curves, then excavate along the line.
Maintenance involves raking to redistribute stones and adding a fresh layer every 2-3 years as material compacts. Weeds will sprout through fabric eventually: spot-treat with vinegar solution or pull by hand. Avoid broad-spectrum herbicides near planted beds. Stone pathways also integrate well when planning backyard entertaining ideas, creating clean zones for foot traffic during gatherings.
Repurposed Materials That Cost Next to Nothing
Salvaged brick, broken concrete (“urbanite”), and reclaimed pavers deliver character at salvage-yard prices, often free if sourced from demolition sites or online marketplaces. Old sidewalk sections, rejected pallet wood, and even wine bottles set in mortar have been used successfully. The aesthetic leans rustic, which suits cottage gardens and informal landscapes better than formal designs.
Broken concrete pieces fit together like a jigsaw puzzle. Dig the path, add 2 inches of sand for leveling, then arrange chunks with the flattest side up. Fill gaps with soil or fine gravel. This technique, popularized on Instructables for creative DIY projects, handles foot traffic well but won’t support vehicle weight. Seal with concrete sealer to reduce water absorption and extend life.
Reclaimed brick varies in quality. Hard-fired pavers (smooth, dense) outlast soft brick (porous, crumbly). Test by soaking a sample overnight, soft brick absorbs water and crumbles in freeze-thaw cycles. Lay brick in sand the same way as concrete, using a rubber mallet to tap pieces level. Herringbone or basket-weave patterns add visual interest without extra cost.
Pallet wood works for raised boardwalk-style paths in dry climates. Heat-treated pallets (stamped “HT”) are safe: avoid chemically treated ones (“MB” stamp). Disassemble, cut to length, and screw planks to pressure-treated 4×4 sleepers set on gravel. Expect a 3 to 5-year lifespan unless sealed annually with exterior wood stain. Not suitable for ground-contact applications or wet regions.
Safety note: Wear leather gloves and eye protection when handling broken concrete or cutting reclaimed materials. Nails, glass shards, and sharp edges are common hazards.
Mulch and Wood Chip Walkways for Natural Appeal
Mulch costs $25 to $35 per cubic yard delivered, covering 100 square feet at 3-inch depth. Hardwood mulch (oak, hickory) lasts 18-24 months before breaking down: pine mulch decomposes faster but costs less. Avoid dyed mulch for vegetable gardens, colorants can leach into soil. Arborist wood chips are often free from local tree services looking to dump loads.
Installation is straightforward: clear vegetation, lay landscape fabric (4 oz/sq yd minimum), and spread mulch 3-4 inches deep. No edging is required, but plastic or aluminum borders keep mulch from washing onto lawn during heavy rain. Slope the path slightly (1/4 inch per foot) to shed water if the route crosses drainage patterns.
Wood chips compress and decompose, requiring annual top-dressing. Budget $20 to $40 yearly for a 60-square-foot path. The organic breakdown enriches adjacent soil, a bonus for garden beds but a drawback near foundations where termites might be attracted. Maintain a 12-inch gap between wood mulch and building structures.
Texture varies: shredded hardwood packs firm and looks refined: coarse wood chips feel spongier and suit woodland settings. Both drain well and stay cooler underfoot than gravel in summer. For pathways that blend into garden design, Gardenista offers landscaping inspiration that pairs natural mulch with low-maintenance plantings.
Caution: Fresh wood chips can temporarily tie up soil nitrogen as they decompose. If using near plantings, age chips for 3-6 months or add nitrogen fertilizer to offset.
DIY Concrete Stepping Stones on a Shoestring Budget
Bagged concrete mix costs $4 to $6 per 60-pound bag, yielding roughly two 12×12-inch stepping stones at 2 inches thick. Quikrete or generic brands work equally well for non-structural applications. Add concrete colorant ($8/bottle) for custom hues, or press decorative items (leaves, pebbles, glass) into wet surfaces.
Molds are the cost variable. Purchased plastic forms run $10 to $30 each, but reusable alternatives include:
- Cardboard boxes lined with plastic sheeting (free)
- Foil roasting pans from dollar stores ($1-$2 each)
- Plywood frames cut to size and screwed together (reusable indefinitely)
Mix concrete to a thick brownie-batter consistency, too wet and it cracks: too dry and it won’t level. Pour into molds on a level surface (sheet of plywood works), vibrate out air bubbles by tapping sides, then smooth with a trowel. Cover with plastic and cure for 48 hours minimum before demolding. Full strength develops after 28 days.
Space stones 18 to 24 inches apart (one comfortable stride). Dig recesses 2 inches deep, add 1 inch of sand, set stones level, and backfill around edges with soil or mulch. Check level front-to-back and side-to-side, a wobbling stone becomes a trip hazard.
For added durability, reinforce stones with wire mesh or fiberglass strands mixed into concrete. Smooth surfaces turn slick when wet: brush texture into the surface before curing for traction. Wear dust mask and gloves when mixing, concrete is caustic and irritates skin.
This method suits low-traffic decorative paths. For main walkways carrying daily foot traffic, consider thicker stones (3 inches) or closer spacing.
Creative Paver Alternatives and Installation Tips
Standard concrete pavers cost $0.50 to $3 each at home centers, but alternatives offer similar function:
- Concrete splash blocks (downspout diverters): $3-$5 each, flat surface works as oversized steppers
- Retaining wall blocks: $1.50-$3 each, uniform size simplifies layout
- Foam paver molds ($15-$25): pour your own pavers on-site with bagged concrete
Installation follows the same base prep: excavate 6 inches deep, add 4 inches of compacted gravel base, then 2 inches of leveling sand. Screed sand flat using a notched 2×4 dragged across edge boards. Set pavers with 1/4-inch gaps, checking level frequently. Sweep polymeric sand (sand with binding agent) into joints, mist lightly, and let cure, it hardens to lock pavers in place and resist weeds.
A plate compactor rental ($50/day) ensures proper base compaction. Hand-tamping works for small paths but won’t achieve the density needed to prevent settling under repeated traffic. Spend the rental fee, sagging paths require twice the labor to fix later.
For curves and irregular shapes, mark the path with spray paint or flour, then cut pavers with a masonry blade on a circular saw. Wear hearing protection and a respirator, cutting concrete generates dust and noise. Wet-cutting reduces dust but requires a GFCI-protected outlet near the work area.
Permeable pavers (grid systems filled with gravel) handle drainage better than solid surfaces and meet some municipal stormwater requirements. These cost more upfront ($4-$8/sq ft) but may qualify for rebates in water-conscious regions. Check local programs before purchasing materials.
Integrating walkways with top backyard entertaining setups creates defined circulation paths that guide guests through outdoor zones without trampling plantings.
Conclusion
Budget walkways prove that good design doesn’t require premium materials, just smart planning and solid installation fundamentals. Proper base prep, drainage consideration, and material-appropriate edging matter more than cost per square foot. Start with a single path to test skills and preferences, then expand as time and budget allow. A finished walkway, regardless of material, transforms a backyard from rough yard to intentional landscape.